Showing posts with label chocolate. Show all posts

Saturday, March 25, 2017

The Perfect Brownies for a Lovely Sunday Evening

Perfect Chocolate Brownies
Hii..
Can you believe it I am actually blogging after a gap of a year..My goodness really its been toooooo long..Well what kept me busy..Apart from work and the usual things, planning an amazing trip to Europe last year was one of the High Points of the previous year..It was a gorgeous vacation to Norway, Denmark, Belgium and our family favorite Switzerland. Europe has always been my love..Why ..There is something so different about it..From Old Cities and Architecture to some beautiful landscapes, it has it all. And ofcourse the Food, always makes me smile.
Since I am a foodie I have to just have to mention about this Papiroen Street Food Market in Copenhagen..Its something I have never experienced before..Its a huge area next to a canal with hundreds of people gorging on some amazing food from all over the world (there must be around 200 food stalls)..It is a mind blowing experience and if your are a foodie and happen to visit Copenhagen then this place is NOT to be missed!!!

Now coming back to the Brownies..Initially I wasn't a huge fan of brownies..the primary reason being I mostly found them too dry and also I am not fond of walnuts. Then one fine day 'Theobroma' happened and I found the perfect brownies that I always wanted, they were gooey and moist with a crust, simply perfect.
Since then I had this great urge to try baking a brownie myself. And so I jumped to my favorite website 'Joy of Baking' and grabbed the easiest Brownie recipe available. And Boy o Boy it turned out so so good. Gooey, Moist with a thin crust..a 10/10.. It is an extremely simple recipe with nothing much to do. We don't even need an electric/hand mixer. A simple whisk will do the job.
Note: I have not added any walnuts but you are most welcome to do so


PLAIN CHOCOLATE BROWNIES

Makes: 16 pieces of 2X2 inches brownies

Ingredients
Ingredients

150 grams semisweet chocolate chopped

1/2 cup (1 stick) (113 grams) unsalted butter, cut into pieces

2 tablespoons (15 grams) cocoa powder

1 cup (200 grams) granulated white sugar

1 teaspoon pure vanilla extract

3 large eggs

3/4 cup (95 grams) all-purpose flour

1/4 teaspoon salt


Procedure


1. Preheat oven to 350 degrees F (180 degrees C) and place the rack in the center of the oven. Butter (or spray with a nonstick cooking spray) an 8 inch (20 cm) square pan, and line the bottom of the pan with parchment or wax paper.

Preparing the Baking pan

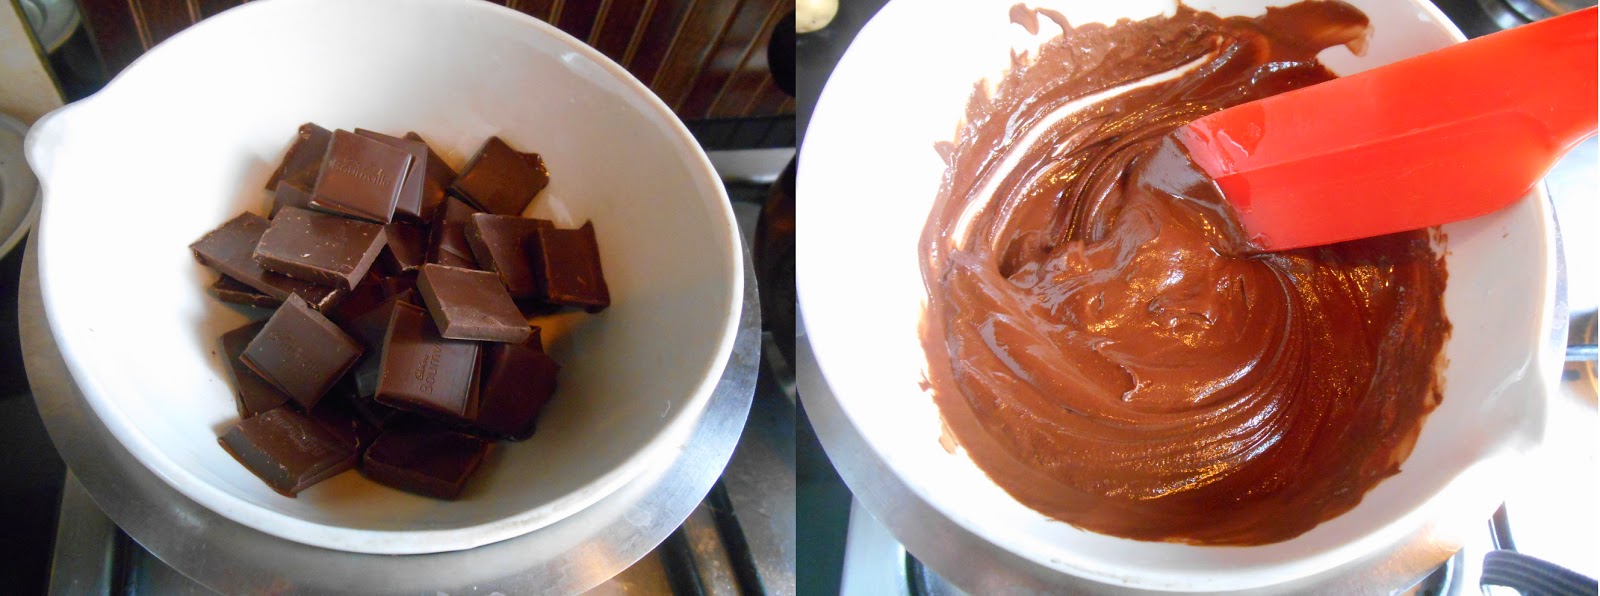
2. Melt the chocolate and butter in a large stainless steel bowl placed over a saucepan of simmering water.
Melting the Chocolate and Butter

3. Remove from heat and stir in the cocoa powder and sugar.
Adding the Sugar and Cocoa Powder

4. Next, whisk in the vanilla extract and eggs, one at a time, beating well after each addition.

5. Finally, stir in the flour and salt

Mixing the Eggs and Flour
6. Pour into the prepared pan and bake for about 25-30 minutes, or until a toothpick inserted in the center comes out with a little batter and a few moist clumps clinging to it. Do not over bake.

Pre-Baking and Post-Baking
7. Remove from oven and let cool on a wire rack. Cut into square pieces. Remove the pieces individually from the Pan. Serve at room temperature or chilled.

The Perfect Brownies
Thanks for Reading!!!

Tuesday, December 29, 2015

A No-Bake Nutella Cheesecake

No-Bake Nutella Cheesecake
Hii..
Who doesn't love a Cheesecake..Its something which can make you smile even on a bad day..Well personally I prefer the No-bake ones to the baked ones..Simply cause I find the flavours and texture more endearing..I usually keep making cheesecakes for some special occasions..But I fine day I was really craving for one so even though there was no special reason I made one and OMG was I happy or was I happy!!
Well I didnot use Cream Cheese here and simply substituted it with some ingredients like cottage cheese, fresh cream and condensed milk (since these were readily available).
I was also craving for some hazelnut chocolate so I decided to incorporate that flavour in the Cheesecake itself. So here goes my Nutella Cheesecake

NO-BAKE NUTELLA CHEESECAKE (EGGLESS)}

Ingredients
Ingredients


For the base
Biscuits - 25-30 digestive biscuits  (or any chocolate biscuit)
Butter - 80 gms

For the cheesecake layer
Paneer (Cottage Cheese) - 200 gms
Condensed milk - 1 tin (400 ml) I used milkmaid
Fresh cream - 200 ml (I used Amul fresh cream)
Nutella Jar - 350 gms
Vanilla extract - 1 tsp
Gelatin - 2 tbsp
Water - 1/2 cup
Salt - 1/4 tsp

Method

Preparation
1. Butter the bottom and sides of an 8 inch springform pan.
2. If you don't have a springform pan, use your normal cake pan or a tart pan. Line the regular cake pan with a clingfilm or aluminium foil. Line the bottom and sides together without cutting the clingfilm so that you can easily lift the cheesecake out when it's set.
3. Add the gelatin to half cup of water and mix. Set aside for 5 minutes to bloom. Microwave for 30 seconds or heat it in a saucepan for 30 seconds and let it cool. it will become a clear solution. Let it cool.

Preparing the Base

FOR THE BASE
1. Take the largest jar of your blender and add crumbled biscuits in it and process to a fine powder and transfer to a bowl.
2. Melt the butter and add it to the biscuit powder and mix well.
3. Transfer this biscuit mixture to the base of the pan and press well. Refrigerate it until we finish the next step.

Preparing the Cheesecake Layer

FOR THE CHEESECAKE
1. Grate or chop the paneer and add it to a blender. Add the condensed milk and fresh cream and blend till smooth.
2. Now add the vanilla extract, and salt. Blend again.
3. Add the entire Nutella spread and blend again till it's smooth and creamy.
4. Transfer to a bowl. Add the cooled gelatin and mix well.
5. Bring the springform pan from the refrigerator and pour the chocolate mixture over the biscuit base layer.
6. Tap once to remove the air bubbles. Cover and refrigerate until set.
7. Let it set for atleast 4 hours. (I did it overnight)
8. Remove the springform pan slowly and decorate as you wish.

Enjoy

Saturday, September 19, 2015

There is always time for a slice of Chocolate Cake

Rich Chocolate Cake covered with Chocolate Ganache
Hiii..
Writing again after a Two Month long hiatus..A lot of interesting things happened in these two months.. The highlight ofcourse being a fantastic trip to Ladakh (India) with my family...What Do I say about Ladakh..Its really difficult to put in words what I felt there..The snow peaked mountains, the grasslands, the people, the rivers, everything was breathtaking!! Such places always remind me of the beauty of nature and how extraordinary our planet is!

The Beautiful Ladakh
But a nice vacation always means coming back to a lot of pending work..And that is what happened when I got back..
Well now that things are kind of back to normal, my hunger pangs tend to set in and what better way to satisfy our tummies than Baking a Rich Dense Chocolate cake covered with mouth-watering Chocolate Ganache.(Who doesn't love a Chocolate Cake anyway)
Most of us have this habit of walking towards the fridge every hour and opening it thinking something new would have suddenly appeared into the refrigerator out of nowhere. Well I am no different, if not every hour but I do this atleast 10 times a day and sometimes it is indeed helpful.
Ingredients
Last evening I noticed some left over Unsalted Butter. What now, well I ll do what I love the most and that is 'BAKE'. I weighed the butter and it was about 90gms so I had to find a recipe which would fit this. After browsing through a few recipes I found one which would be just ideal for this much butter and that is a Quick Rich Chocolate Cake and well why not cover it up with some Ganache. I followed the Chocolate Cake recipe from 'Joy of Baking' and Taaadaaa the Cake was ready in a jiffy. The only precondition was the Cake covered with Ganache needed a few hours to Set properly so I had to resist myself for the night. But Yes the first thing I had in the morning was a slice of Cake.

Note: This is an extremely simple recipe without any requirement for a stand/hand mixer. This is a dense cake adding to the richness of chocolate

Mixing the Dry Ingredients
RICH CHOCOLATE CAKE COVERED WITH CHOCOLATE GANACHE

Makes
: An Eight Inch Cake

Ingredients

Chocolate Cake:1 1/2 cups (195 grams) all purpose flour

1 cup (200 grams) granulated white sugar

1/4 cup (25 grams) unsweetened cocoa powder (not Dutch-processed), sifted

1 teaspoon baking powder

3/4 teaspoon baking soda

1/4 teaspoon salt

1/3 cup (75 grams) unsalted butter, melted

1 cup (240 ml) warm water

1 tablespoon lemon juice (or vinegar)

1 teaspoon pure vanilla extract

Chocolate Frosting:

6 ounces (170 grams) semi-sweet chocolate, chopped

3/4 cup (180 ml) heavy cream (35% butterfat)

1 tablespoon unsalted butter, room temperature


Preparing the Cake Pan for the final Cake Mix
Procedure:
1. Preheat oven to 350 degrees F (180 degrees C) and place rack in center of oven.
2. In an bowl stir together (with a whisk) the flour, sugar, sifted cocoa powder, baking powder, baking soda, and salt.
3. Add the melted butter, water, lemon juice, and vanilla extract. With a fork/whisk, mix all the ingredients together until well blended.
4. Prepare the cake pan by greasing it with butter and then flouring it. }
5. Pour the cake mixture into the pan.
6. Bake in preheated oven for about 30 minutes, or until the cake springs back when lightly pressed and a toothpick inserted in the center of the cake comes out clean.
7. Remove from oven and place on a wire rack to cool.
The Freshly Baked Cake
FROSTING with GANACHE :
8. Place the chopped chocolate, cream, and butter in a heatproof bowl.
9. Place over a saucepan of simmering water and melt until smooth.
10. Remove from heat and let stand at room temperature until it is of pouring consistency.
11. Place the wire rack (with the cake) on a plate covered with wax paper. Then pour the frosting over the cooled cake so that the extra ganache drips down.
12. Keep in the refrigerator for 4-5 hours or preferably overnight

Preparing the Ganache
Pouring the Ganache
Important Points:

1. Before pouring the ganache make sure the cake has cooled down (you can also chill it in the fridge)
2. When you prepare the ganache initially it will be thin, as you keep it to cool down it will thicken, but take care that the ganache shoould not be extra thick and should remain in its pouring consistency
3. The extra ganache can be used to make chocolate truffles (though we just gobbled it up before that hehe)

Thanks for reading..Keep Calm and Eat some Chocolate Cake!!

Chocolate Cake Fan Forever

Sunday, April 26, 2015

Cheers to Life with Chocolate Mousse Shots

Chocolate Mousse Shots

Hii. Back to writing after a gap of seven whole days. It has been really a very scary weekend. Reason - EARTHQUAKES.

Me-High Rise Buildings-Earthquakes, its been a long association, Since I was born we have been living in High Rises well almost all my life. And earthquakes have always been quite prevalent, yet every time there is one, I get scared to a whole new level.
This weekend has been quite an adventure with a couple of shakes last afternoon and one today. Looking at the devastation that has happened to our neighbouring country Nepal, I can't help but Thank the Almighty for life. And my sincere prayers to all those who have suffered losses.

All these incidents make me wonder about Life and its Unpredictable Nature, Every moment is so sudden yet there is so much hatred jealously enmity amongst people. I think we should just be Happy and Thankful to be alive each moment and Celebrate that and ignore all issues which cause any turmoil in our minds. But as they say easier said than done. Though no harm in trying..

So Cheers to Life with these CHOCOLATE MOUSSE SHOTS (Recipe for the Chocolate Mousse taken from JoyofBaking)

CHOCOLATE MOUSSE SHOTS

Makes: 8 shots

Note: The chocolate cups should preferably be made the previous day. 
Vegetarians: Skip the Egg part of the recipe. The mousse won't be as fluffy but will still taste extremely good.


Starting with the Chocolate Cups

Ingredients:
Dark Chocolate – 360gms
Butter – 30gms
Eggs – 2 large
Vanilla Essence – 1/2 teaspoon
Heavy Cream – 120ml
Sugar – 4 tablespoons


The Disposable Cups and the slit


Procedure:
  1. Take Half of the Dark Chocolate (180gms) and chop it into small pieces.
  2.  Microwave on High for around 90 secs
  3. Take out and stir well with a spatula till it melts completely and tempered to room temperature (Make sure the chocolate doesn't get over heated)
  4.  Once the chocolate is melted, take 8 small plastic (disposable) glasses and make a small slit on the side (top). See Picture Above
  5. Pour 1 tablespoon of the melted chocolate and rotate the glass so that the entire inside surface is covered with chocolate . Pour the extra chocolate back into the bowl. Repeat for all Eight glasses and keep the glasses to refrigerate. (preferably overnight or atleast 4 hours)
  6. Covering the cups with chocolate
  7.  Take the two eggs and separate the egg yolks and egg whites in two small bowls and cover with a plastic wrap and keep aside till it room reaches temperature.
  8. Starting with the Mousse
  9.  In another bowl take the second half of the chocolate and the butter and melt it over a double boiler.
  10. Let it cool then add the egg yolks and mix well and keep the chocolate mixture in refrigerator.
  11. Melting the Chocolate over the double Boiler
  12. In a bowl take the egg white.Beat with a stand or hand mixer till foamy, Now add 1/8th teaspoon vinegar. Keep beating. Add 2 tablespoons Sugar gradually and keep beating till soft peaks are formed.
  13. In another bowl take the Heavy Cream, Vanilla Essence and two tablespoons of Sugar and beat well till it forms peaks.
  14.  Take the chocolate mixture and add the beaten egg whites in three parts. Keep folding it in slowly.
  15. Adding the Whipped Cream and Egg Whites
  16. Now add the whipped cream mixture gradually and fold it in the chocolate egg mixture. The mousse is now ready.
  17. Take out the chocolate cups and peel off the plastic (starting from the cut we made on the glass) very carefully trying not to break the chocolate cups inside (This step is tricky)
  18. Peeling off the Cups and Filling the Mousse
  19. Divide the Chocolate Mousse into the chocolate cups. Decorate it any way you wish and keep it in the refridgerator for a couple of hours
  20. Take them out just before you'll serve or else the outside chocolate cup will melt.
    The Chocolate Mousse Shots ready to be served
    My Life's Motto: Do what you love with the people you love in this very life. Because There are no second chances. Live Love and Enjoy, Travel- See the world, Eat Well Sleep Well Work Well and Help others, Try not to have Regrets!!
    LIVE YOUR DREAMS!!!
    Ciao and Thanks for giving my blog a part of your precious time! :) :)

Thursday, April 9, 2015

Perfect Dessert for a House Party - Individual Cheese Cakes

Individual Choco Chip Cheese Cakes topped with Caramel Sauce
Hii..
I am very sure many of you occasionally have a house party. If you are like me who love to cook each dish for the guests then this one is an ideal choice for Dessert because you can get it done the previous day.

I am specially a fan of Individual Cheesecakes (than a normal 9 inch one) because serving this is very convenient.

In this one I have topped it with Caramel Sauce and Chocochips, you can try doing it with other toppings like Blueberry, Strawberry, Chocolate Sauces or Lemon Curd. This Cheesecake can act as a base to many flavours.

The recipe has THREE PARTS. I have borrowed it from three different websites and COMBINED it according to my requirements. One being the Home-made Cream Cheese, Second the Caramel Sauce and Third the Individual Cheesecakes themselves.

I have compiled here the three parts together for convenience..

Note: You can skip the 1st part if you are using ready-made cream cheese.

INDIVIDUAL CHOCO-CHIP CHEESECAKES TOPPED WITH CARAMEL SAUCE


Makes: 12-16 Individual Cheese Cakes

PART ONE  - Home Made Cream Cheese (Skip this part of you are using Ready-made Cream cheese)

Ingredients:
Paneer/ Cottage Cheese - 400grams
Yoghurt / Curd – 3/4 cup

Procedure:
1. Take paneer in a mixer and Grind it to a smooth paste.
2. Add in the curd or yogurt and grind it further.
3. Place a sieve over a bowl and line it with cheese cloth and pour in the mixture and cover it up nicely
4. Put it in fridge overnight and Discard the water collected in the bowl often
5. Remove from cloth – Cream Cheese is ready.


PART TWO - Caramel Sauce

Ingredients:
1 cup (200g) granulated sugar
6 Tablespoons (90g) salted butter, cut up into pieces
1/2 cup (120ml) heavy cream

Procedure:
1. Heat granulated sugar in a medium saucepan over medium heat, stirring constantly with a high heat resistant rubber spatula or wooden spoon.
Wobble Test
2. Sugar will form clumps and eventually melt into a thick brown, amber-colored liquid as you continue to stir. Be careful not to burn.
3. Once sugar is completely melted, immediately add the butter. Be careful in this step because the caramel will bubble rapidly when the butter is added.
4. Stir the butter into the caramel until it is completely melted, about 2-3 minutes.
5. Very slowly, drizzle in 1/2 cup of heavy cream while stirring. Since the heavy cream is colder than the caramel, the mixture will rapidly bubble and/or splatter when added.
6. Allow the mixture to boil for 1 minute. It will rise in the pan as it boils.
7. Remove from heat and allow to cool down before using.
8. Cover the caramel tightly and store for up to 2 weeks in the refrigerator. Warm the caramel up for a few seconds before using in a recipe.


PART THREE – The Individual Cheesecakes

Ingredients:
For the Crust:
100 gms Oreo Biscuits – Powdered in a Grinder
70 gms melted butter (sated/unsalted)

Cooling on Wire rack
For the Filling:
450 gms Cream Cheese
2/3 cup (130 grams) granulated white sugar

1/8 teaspoon salt
2 large eggs, room temperature
1 teaspoon pure vanilla extract
1/2 cup (120 ml) Hung Curd/Sour Cream, room temperature
1/2 cup Chocolate Chips

Note: To prepare hung curd take yoghurt..tie in a muslin cloth and hang it over the basin or a bowl so that the extra water drips out for around 1 hour

Procedure:
1. Line 12 muffin cups with paper liners.

2. Crust: In a small bowl combine the Oreo biscuit crumbs and melted butter. Press a heaping tablespoon of crumbs onto the bottoms of the 12 muffin cups. Cover and refrigerate while you make the filling.

3. Filling: In the bowl of your electric mixer (or with a hand mixer), beat the cream cheese on low speed until creamy and smooth. Add the sugar and salt and beat until combined. Scrape down the sides of the bowl as needed. Add the eggs, one at a time, beating until incorporated. Add the vanilla extract, Hung Curd and beat until incorporated. Mix the Choco chips. Remove the crusts from the refrigerator and evenly divide the filling among the 12 muffin cups.

4. Preheat oven to 300 degrees F (150 degrees C) and place oven rack in the centre of the oven

5. Bake (12 at a time) for about 18 - 22 minutes or until firm but the centres of the cheesecakes still wobble a little. Remove from oven and place on a wire rack. Let cool and then cover with plastic wrap and refrigerate (a few hours or even overnight).

6. To serve, gently peel off the paper liners and place on your serving plate

7. Now top it with the slightly warm Caramel Sauce and few Choco chips.

Note: The catch here is that the Cheesecakes should not be under done or over done. The baking time varies for each oven. You need to do the Wobble Test. If you shake the baking dish slowly, the centre of the cheesecakes should wobble(like a jelly) while the sides should be firm.

Top it with the Caramel Sauce

You can prepare the cheese cakes and keep it refrigerated and serve it the next day.. Just before you plate the cakes top it with the Caramel Sauce (Warm the Sauce a bit)
Hope you try it out at the next house party.. Do let me know.. Thanks n Ciao!!

Friday, March 27, 2015

The Middle Class Girl who loves Cheesecakes

Hi.. One of those days when in-spite of all the piled up work your mind still tends to wander to the childhood days again and again..

I was born in Delhi to an Engineer Dad (and a Government Employee) and a Homemaker Mom..and like most others Me n A(my elder sister) had a memorable and enjoyable childhood..My father was the only earning member in the family so obviously ours was a very  'middle-class' life with No huge expensive toys or branded clothes or family trips abroad..But what attracted us the most were the warm gestures and bonding we all shared..
Dining out at fancy restaurants was not even a luxury, it was an outrageous extravagance..I remember our monthly 'eating out' used to be mostly at Nirula's (Connaught Place) n this was the most fancy things we did when it came to food..And otherwise it was the regular 'Chhole Bhature, Chaat and Gol Gappe which Maa used to treat us to when we went shopping with her to the Shankar Market or Karol Bagh..
But there was this Annual ritual Baba(dad) used to always do on Christmas and that was get us a boxful of Chocolate Pastries and Lemon tarts from Nirula's or Wengers while coming back from office... I still remember the excitement on A's(sis) and my faces when Baba used to enter the house..
Well from that early age I had realised my obsession with sweet things..Well lets fast forward my life straight to college..On one of my friends birthday treats I visited this new place in town 'The Big Chill Cafe'...And that is where for the first time in my life of 18 years I tasted a 'Cheesecake'.. What can I say.. My taste-buds and my mind exploded with that magical taste and flavour.. With the kind of pocket money that we had during our college days to be able to afford a 'cheesecake slice' frequently was next to impossible..so the only option was to save cash or wait for someone to throw another birthday party...
Its been more than a decade since that day but my love for Cheesecakes just kept growing..Never imagined though that someday I might just making one myself.. But well as they say :
"Itni shiddat se maine tumhe paane ki koshish ki hai
ki har zarre ne mujhe tumse milane ki koshish ki hai....
kehte hai agar kisi cheez ko dil se chaaho
toh poori kaynath tumhein usse milane ki koshish mein  lag jaati hai
" ..

Well maybe this was meant for bigger things but in my case this refers to my love for Cheesecakes...

Well after going through many recipes I chose a 'No-Bake Chocolate Cheesecake' as my first ever Cheesecake that I made myself.. And as you can see this was quite an emotional moment for me..hahahaha!! Here goes the recipe (not mine ofcourse), I borrowed it from another blogger :http://www.fullscoops.net/2014/08/eggless-no-bake-chocolate-chilli.html .. I excluded the Chilli part of it.. I ll fill in the recipe again for help:

NO BAKE CHOCOLATE CHEESECAKE (EGGLESS)


Note
: This recipe needs at least 6hrs of setting time in the refrigerator or preferably overnight- I did overnight


Makes: One 8-9 inch Diameter Cheesecake

Ingredients:


For the base

    Biscuits - 35-40  sunfeast/Gooday chocolate biscuits  (or any chocolate  biscuit)
    Butter - Regular Salted Butter will do -  80 gms

For the cheesecake layer

    Paneer (Cottage Cheese) - 200 gms
    Condensed milk - 1 tin (400 ml) I used milkmaid
    Fresh cream - 200 ml (I used Amul fresh cream)
    Chocolate chips - 300 gms (or chopped chocolate)
    Instant Coffee powder - 1/2 tsp (or more if you prefer)
    Cinnamon powder - 1/2 tsp
    Vanilla extract - 1 tsp
    Gelatin - 2 tbsp
    Water - 1/2 cup
    Salt - 1/4 tsp

For Topping


Chocolate Chips/ Chocolate Vermicelli - 50gms

Procedure:


Preparation
1. Butter the bottom and sides of an 8 inch springform pan.
2. If you don't have a springform pan, use your normal cake pan or a tart pan. Line the regular cake pan with a clingfilm or aluminium foil. Line the bottom and sides together without cutting the clingfilm so that you can easily lift the cheesecake out when it's set.
3. Add the coffee powder to the chocolate chips and melt it using a double boiler or in the microwave and set aside to cool. Please remember not to over heat the chocolate. Keep stirring in intervals and once 3/4th of the chocolate has melted you can remove from the heat and stir for the rest to melt.
4. Add the gelatin to half cup of water and mix. Set aside for 5 minutes to bloom. Microwave for 30 seconds or heat it in a saucepan for 30 seconds and let it cool. it will become a clear(translucent) solution. Let it cool.

For the Base

1. Take the largest jar of your blender and add crumbled biscuits in it and process to a fine powder and transfer to a bowl. 

2. Melt the butter and add it to the biscuit powder and mix well.
3. Transfer this biscuit mixture to the base of the pan and press well. Refrigerate it until we finish the next step.

For The Cheesecake
1. Grate or chop the paneer and add it to a blender. Add the condensed milk and fresh cream and blend till smooth.
2. Now add the vanilla extract, cinnamon powder and salt. Blend again.
3. Add the melted and cooled chocolate and blend again till it's smooth and creamy.
4. Transfer to a bowl. Add the cooled gelatin and mix well.
5. Bring the springform pan from the refrigerator and pour the chocolate mixture over the biscuit base layer.
6. Tap once to remove the air bubbles. Cover and refrigerate until set. (preferably overnight)
7. Remove the springform pan slowly and decorate with chocolate chips or chocolate vermicelli on top.
 
Bon Appétit ..


Pik:

Chocolate Cheesecake


I would have preferred smoother edges..Well as they say There is always a next time!!


Note: You an use Cream Cheese instead of Paneer but in India, Cream Cheese is too darn expensive and trust me once the cheesecake is done you can hardly spot any difference (After all in some ways I still remain the 'middle-class' girl worrying about her pocket money)!!

Eat Well!! Ciao! Thanks for reading!